For this project, we are using something called ZoneMinder, it runs on a server, and is totally open source, and a mature project that is used all over the world in both home and corporate settings. We'll be setting it up and connecting the cameras. This project can be done using Docker or Kubernetes, which ever one you choose from the Virtualization guide should be fine and I'll go through the setup steps for both options.
Rating
- Difficulty of Project: Intermediate
- Cost:
- Recommendation skill level: Intermediate
- Time commitment: 1 hour
Skills and assumed supplies
- A Server
- Either Docker or Kubernetes on your Server
- Ability to use the command prompt
NOTE: Need a refresh? Check out my YouTube playlist on how to use the Command Prompt
Supplies and costs
- IP Camera from this list(Compatible with ZoneMinder)
- Power Supply for the camera (or a PoE setup)
- Cat5 cable
How to set up ZoneMinder using Docker
The ZoneMinder documentation is written for Docker, so we can follow that. However the documentation on the website does go to some deprecated repos and dead links. So we want to go to the ZoneMinder repository directly, which lives Here to find what we need. Once you go to the repository, you'll notice the docker image says “zoneminderhq/zoneminder:latest-ubuntu18.04” And this can look concerning since you are unlikely to be running Ubuntu 18, however because we are using docker, that should be ok. Docker can run a previous version of the OS without you needing to do anything.A repository is a way for us to share and save code more easily. It can also be a place where we can share instructions with others on how to complete projects. If we think back to the Virtualization Guide we can remember about containers. A container is a way to both share projects and keep them contained. I used the analogy of boxes. We can think of the ZoneMinder repository as a place to see and share the recipe for how to make our box.
First we need to login to our server. Then we can run the given Docker command
docker run -d -t -p 8443:443
                -e TZ='America/New_York'
                -v /home/user/zoneminder/events:/var/cache/zoneminder/events
                -v /home/user/zoneminder/images:/var/cache/zoneminder/images
                -v /home/user/zoneminder/mysql:/var/lib/mysql
                -v /home/user/zoneminder/logs:/var/log/zm
                --shm-size="512m"
                --name zoneminder
                zoneminderhq/zoneminder:latest-ubuntu18.04
NOTE: You should change "user" to the username you have on your server in the above command.

Make sure you make a note of what IP Address you used. You'll need to go to http://IPADDRESS/zm I don't recommend changing the port at this point in time, you can consider doing that later once you've got everything up and running.
How to set up zoneminder using Kubernetes
If you haven't already set up your namespace, i recommend you do that first. I have a sample recipe for that here that will create a namespace called smart-home, you can reference how to use kubectl if you want to refresh on how to set that up. Check to make sure your namespace is up by doing get namespacesNext we need to setup our YAML file for zoneminder, a sample is here, you can use this but you MUST change the location of your storage. I have a comment in there on where to change the YAML, and some notes about how the YAML is put together, but you have to make sure you have a path to where you want your information stored. If you update nothing else in that file, you still HAVE to update the path in BOTH places on the persistent volume areas.
If you need a reminder on how to use kubectl please go check out my kubectl guide here and make sure to run in the correct directory
- You should navigate to your kubernetes directory first, making sure to go to the folder that has your YAML files.
cd ~/kubernetes/smarthome
- Edit your zoneminder YAML, you can use my sample as your base if you like.
nano zoneminder.yaml
- Apply your YAML so that the changes will start
kubectl apply -f zoneminder.yaml
- Check to see if your pod is up, make sure to use the correct name space! If your's isn't smart-home make sure to change that in the command to match
kubectl get pods -n smart-home
- Last we need to check services to see that everything is running and to get our IP address of the pod
kubectl get services -n smart-home
How to use Zoneminder
We need to setup our cameras, you can plug your camera in to your power source, and make sure that it is connected to the internet. Now depending on your camera there might be different setup options, in my case for the camera that I've chosen and recommended for beginners, you're going to go to the IP address of that camera, the IP address by default of this hikvision camera is 192.168.1.64 and you're going to put that into the address bar of your browser. Once you do that it should ask you for a login to set up the camera, keeping the user as admin is fine but you will need to choose a strong password. You cannot paste anything in there you have to type it so make sure that the password is both strong and easy to type.NOTE: when opening up your web browser to go to zone minder you MUST use http://IPADDRESS/zm for this to work, if you don't include the /zm you will end up at a blank apache welcome page which is not what we want. Now we need to go to our zoneminder page, create a login and then you'll see the dashboard
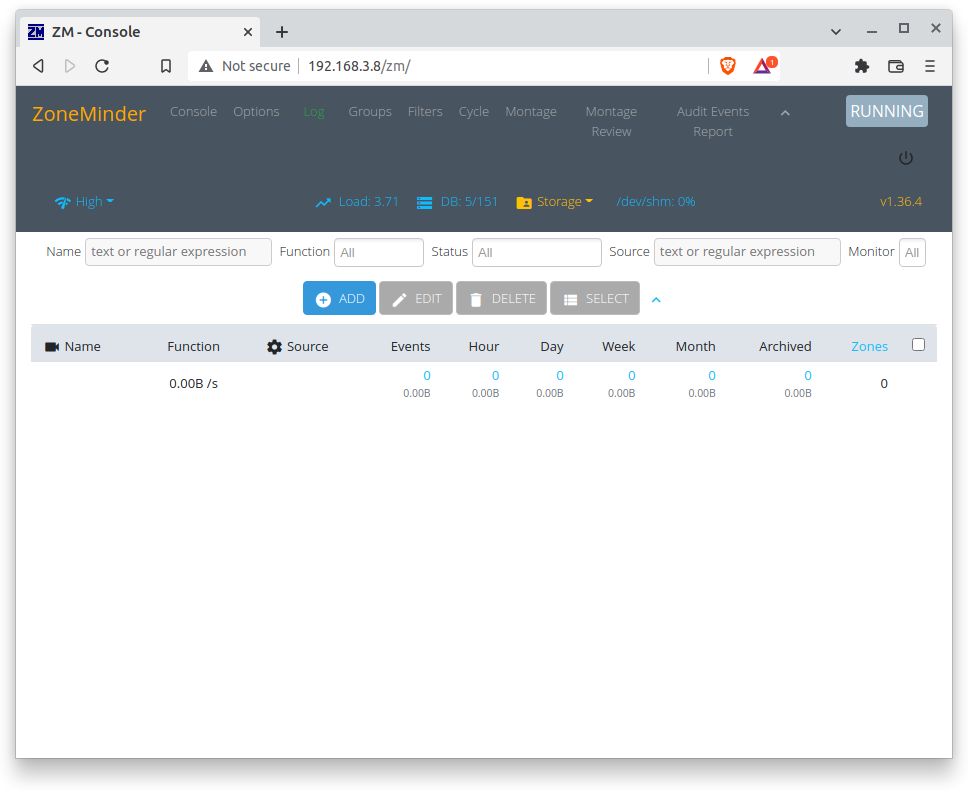
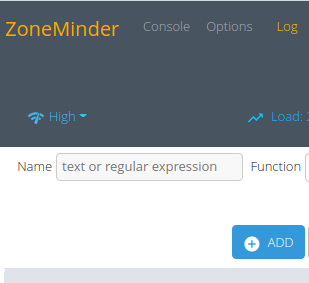
Now we need to add a camera to our dashboard, The way that we are going to connect it to zone minder is go into the general console, and then hit the add button.
In the general section we are going to name our camera and then the other defaults are fine except function we are going to switch to modect(motion detection).
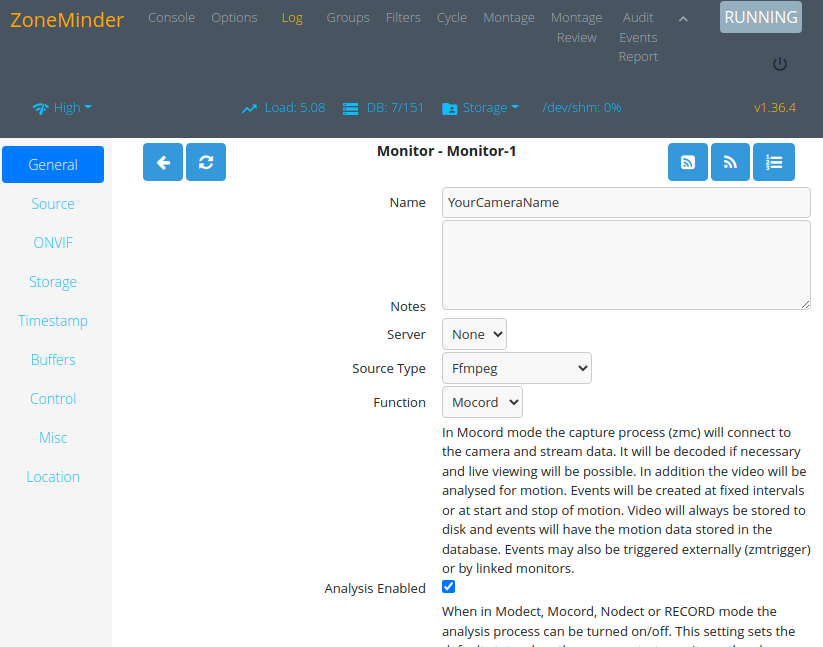
Next we are going to point to the actual camera, the way that we are going to do that is use a source path which you can find by looking at “source” on the left hand menu., The source path format is
rtsp://user:password@IPAddress:port/somepathsource type is ffmpeg If you're using the same camera type I am the path is
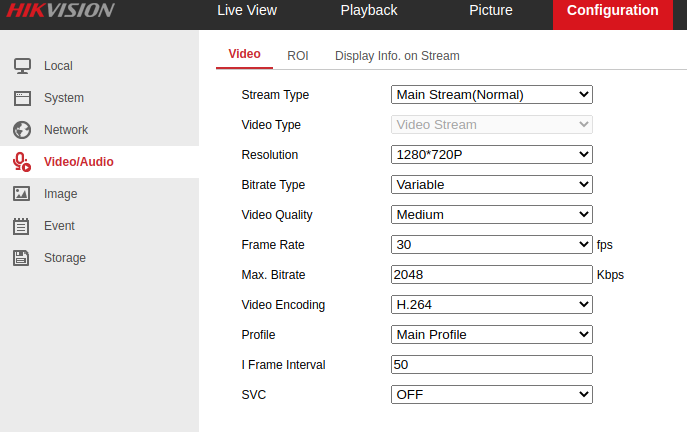
rtsp://USER:Password@192.168.1.64:554/Streaming/Channels/1?tcpand the Capture resolution is 1280x720.

If you are going to be using rtsp make sure that you are using Port 554. If you use any of the other ports the streaming won't work properly.
If you are using a different camera, make sure your capture resolution matches, you can find that at the page for your camera which can be accessed by going to the IP address of your camera. And then when you look at the audio/video section you should see a resolution that is two numbers.
By default the cameras I bought use the same IP address, so if you have multiple cameras you're going to want to go in and give them all different default addresses. If you log into your camera page, by going to the original default IP address of 192.168.1.64, and then you go into network, and then basic settings, there is a section for ipv4 addresses and you're going to want to update this to have a different static address and make sure that is in your network diagram you've written down what the static address is of each of your cameras. I recommend picking addresses that won't interfere with other things on your network. For example, if you have a 192.168.X.X network, consider making a block just for cameras, so you would have 192.168.1.100 until 192.168.1.110 all just cameras. You need to make sure you're sticking to addresses that are private on your network, you can't just pick numbers at random.
One thing that you might end up needing to do is make some edits in Zoneminder, for example let's say you have to move your camera or change the IP address or you want to add in another camera of this exact same type and you don't want them to get confused with conflicting IP addresses, or something like that, you're going to need to edit what's going on in Zoneminder. The way that you do that is you open up the Zoneminder console, and then you look at the monitor that you want to edit. Let's say it's camera one, the way that you edit the monitor for camera one is you click on the IP address of the camera, if you click on the name of the camera it'll take you to the stream. The most common things that you are likely going to want to edit are going to be the name of the camera, the IP address of the camera, and the stream path for the camera.
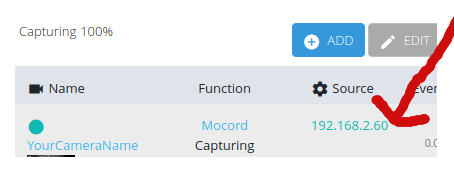
I would also recommend going and changing the name of your camera in both ZoneMinder and your camera's firmware, so if you go into the settings on zone minder you can name each of your cameras as you are adding them as shown above. One of the reasons that I would recommend that you do this is so that you know exactly which camera you're looking at and you can keep an accurate map of your system. This is where you would change the camera name if you're using the same Hikvision camera I am.

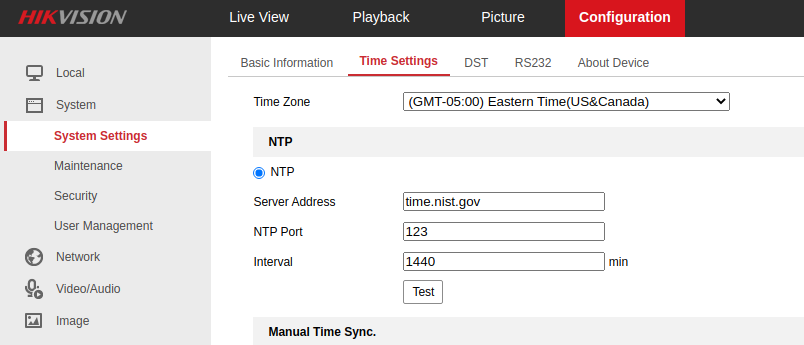
I also recommend that you go in and update the timestamp on the camera system's firmware, if you go into the interface that you were using for the camera, (that's by putting the IP address of the camera into the web browser), you will see that you have the option to either manually set the time on the system, or use a shared server, or use your computer's time. If possible, I recommend that you use the time based off of a server or computer, but you are going to want to make sure that you update the time stamp so that it's accurate An example of using time.nist.gov for your time settings is here:
Recommended Upgrades
- Secure your ZoneMinder by making it require a login and use https, there are several guides you can use to do this.
- Add a VPN to your server so that you can access your zoneminder dashboard securely while you're away from home
- Consider changing the motion detection options on your cameras so that it's not all motion, just sustained motion so you don't fill up your hard disk
Ideas for how to save some Money
- Consider buying used CCTV cameras from a company or reputable reseller
- Buy in bulk, if you know you want 5-10 cameras buy a bunch so you can get the bulk discounts
- Consider going to sites that sell over stock, older cameras, or resell from companies like ebay or buy direct from the manufacturer
- Make your own cables, don't buy them pre-made. A huge box of wire, RJ45s and a crimper can be bought for $200, so if you're going to be needing a lot of cables for projects it's worth considering making them. You can learn how during Networks 1 if you want to take a beginner course on networking.
- Set up Power over Ethernet (PoE) in your house so that you can run the cameras off PoE instead of needing the power blocks for each camera
- Consider buying older cameras, the ones I used in this project are models from 10 years ago because the camera quality was enough for my needs, think about your use cases instead of buying the most expensive cameras you can find because of advertising. Even much higher quality cameras can be found for as little as $50-$75 per camera
Cost breakdown with suggested supplies
| Supply Name | Cost | Weblink |
|---|---|---|
| HIKVISION DS-2CD2012-I 4MM Network Camera, IR Mini Bullet, Day/Night | $35 | https://a.co/d/hbciywI |
| 12V 1A Power Supply to match your camera | $5 | https://a.co/d/cuVhpov |
| Cat 6 Ethernet Cable long enough to go from your router (or wall port) to your camera | $10 | https://a.co/d/cT0GcZb |
| Total | $50 (per camera setup) |